

How To Install Windows 10 In Raspberry Pi 3
 The Raspberry Pi is normally associated with Linux operating systems similar Raspberry Pi Os ( once known as Raspbian ), Ubuntu, etc. But what about running Windows 10 on your Raspberry Pi ? Well, it would be capital for surely. however, Windows 10 is placid not officially supported for Raspberry Pi. Microsoft ' s entirely Os for Pi is the old Windows 10 IoT Cadre that but lets you lot execute ocular Studio codes only can non piece of work equally a standalone Os with its GUI. Though it is sol, it didn ' thymine finish some passionate developers to discover a way to run a broad desktop version of Windows ten on Raspberry Pi. They take made it possible with the WoR project. With that, they developed a cock to flash an ARM double of Windows 10 on an SD Card ( or an SDD ), that tin boot on a Raspberry Pi. In this template, I ' ll walk you through the claim steps to install Raspberry Pi Windows ten.
Requirements
Steps to Install Windows 10 on Raspberry Pi 4/3/ii
footstep 1 : download the Required Files
In order to get started with the facility, y'all have two things to download. i. The WoR Tool [ hypertext transfer protocol : //world wide web.worproject.ml/downloads ] When you lot download this y'all will get a travel rapidly file with everything inside it. Keep information technology for now. Nosotros ' ll practice it by and past. ii. UUP file for Windows 10 ARM For downloading a UUP file you can utilize any one of the follow websites. Each of them works a bit differently. On these websites, you only have to cull a Windows version, build number, speech, and edition like Pro, Home, Ultimate, etc .
- https://uupdump.internet/ (for Linux or Mac PC)
Download the file from this web site merely if your estimator is non running on Windows OS. While on the web site, I recommend selecting only i edition to keep the file size smaller and make the installation faster. merely cheque the needed edition and leave others unbridled. immediately choose the Download and catechumen to ISO option. 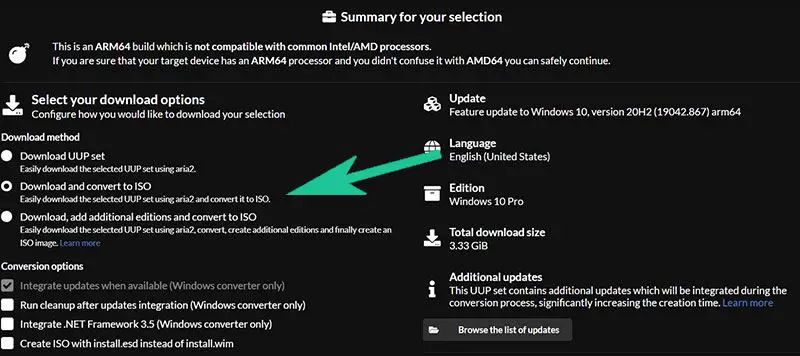
- https://uup.rg-adguard.net/ (for Windows PC only)
This locate has got a much more intuitive interface where you lot tin can easily download the file. Use the drop-downwardly arrows to choose the compulsory translation issue, edition, build number, etc. and so suction stop on the Download ISO compiler in One click! option in the download blazon. Download the cmd file by clicking on the link appearing on the properly side. This will expect something like this : 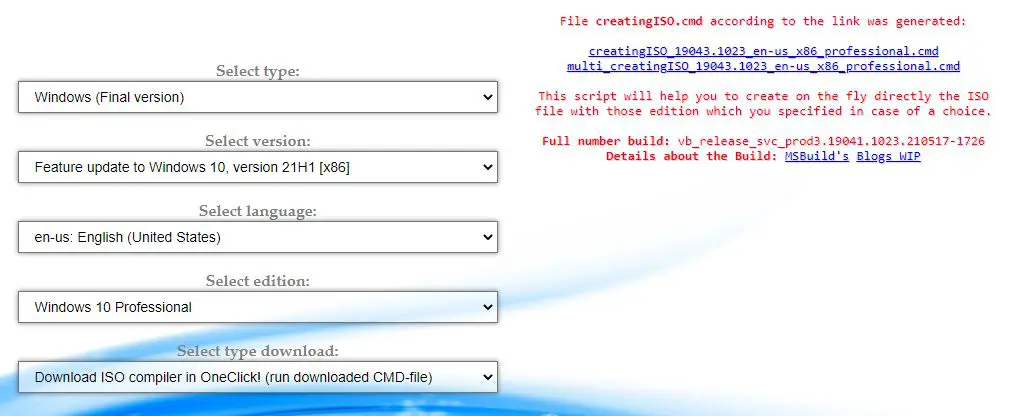
As common, before doing something big, we accept to update the firmware of our Raspberry Pi. To practice the lapp, open a terminal and type the follow command .
sudo apt update sudo apt full-upgrade in one case done with that, terminate your device and you don ' t need the Raspberry Pi OS ( Raspbian ) anymore .
footstep 3 : Build Windows ten ISO File on your personal computer
The adjacent stride is to build the Windows 10 ISO paradigm file using the cmd file that we ' ve download in footprint i. If you downloaded the file from the 2nd web site you lot will go the direct cmd file whereas if yous have downloaded information technology from the first web site ( uupdump.net ) so y'all need to extract the slide fastener file to see a file named " uudp_download_windows.cmd " .
- Double click on the cmd file and you volition see a terminal window. Printing 0 when asked. Information technology will immediately start to download some files for the procedure. This will be of a few gigabytes and take a lot of time if your internet connectedness is slow.
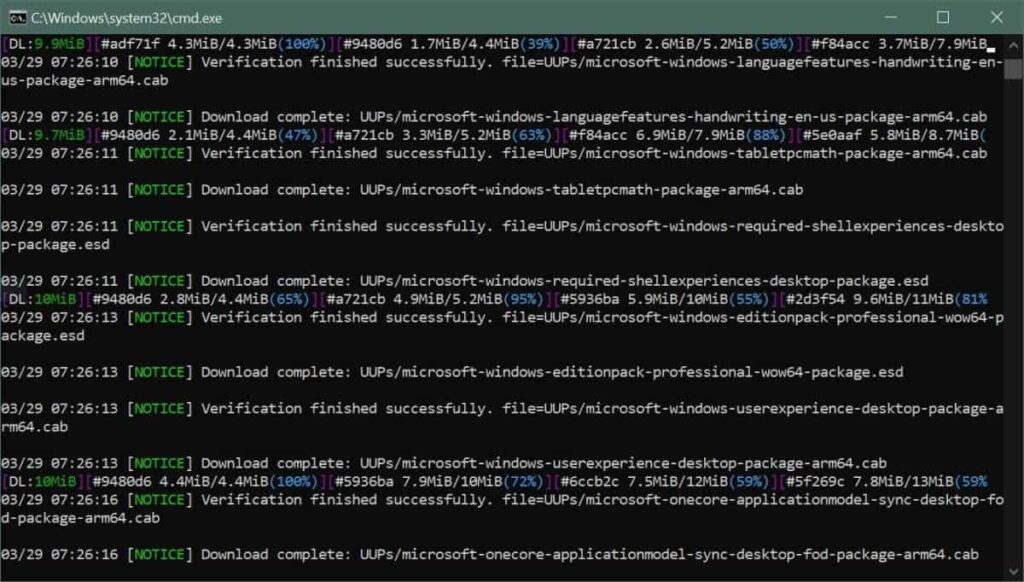
- Once the downloads are complete it will automatically start to build the ISO image file.
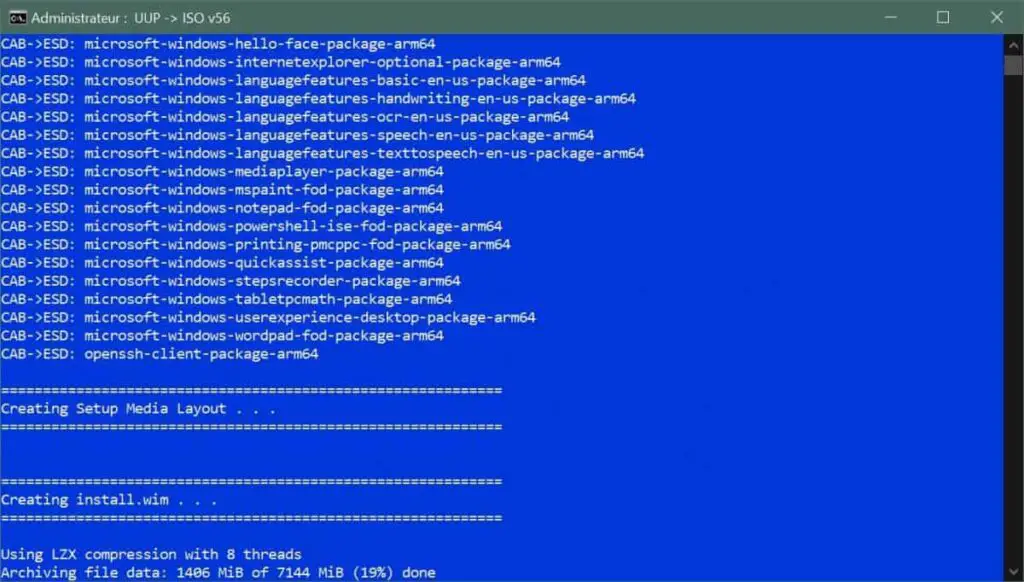
- This also volition take some fourth dimension. If you lot encounter whatever stuck somewhere in the process only printing the Enter.

step 4 : Flash the ISO File with WoR Tool
now it ' 2d time to flash the ISO file that nosotros build just now. hither comes the use of the WoR erect. It is a simple and easy-to-use wink tool. To flash the ISO, follow the below steps .
- Firstly, extract the WoR_Release_….null archive to a new folder on your reckoner.
- Observe the wor.exe file and double-click on it.
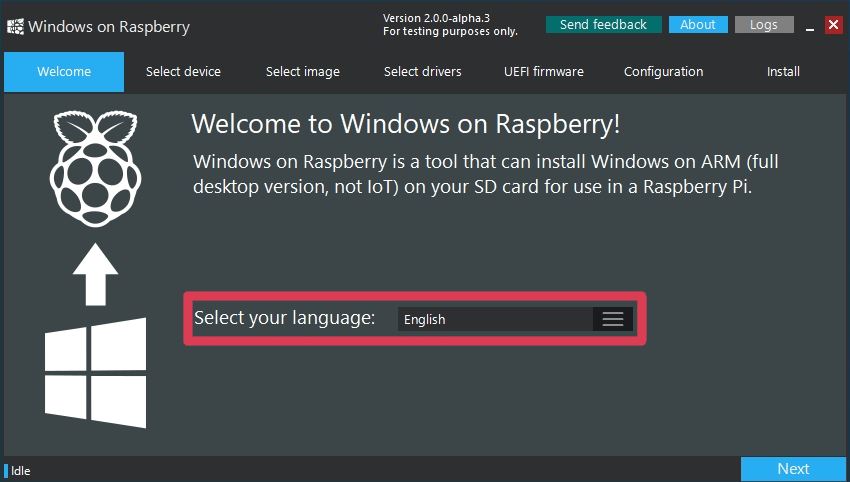
- Select your preferred language from the drop-down list.
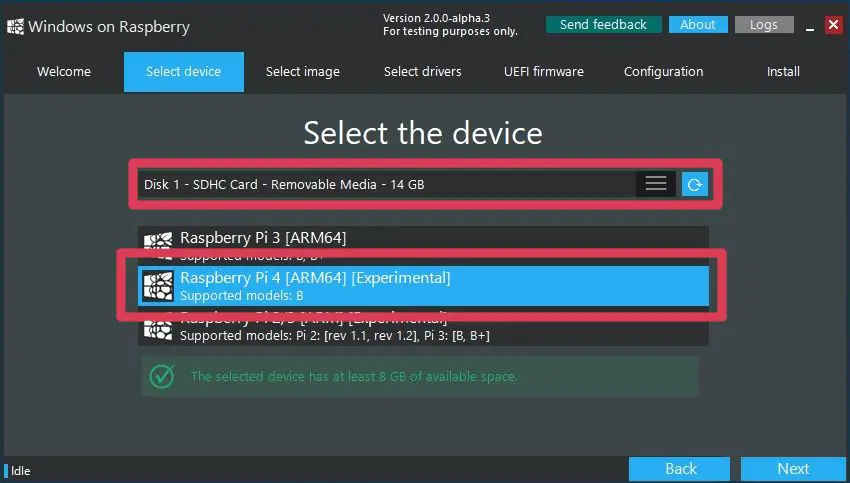
- Choose the target drive (your SD Card or SSD drive) and the model of your Raspberry Pi board.
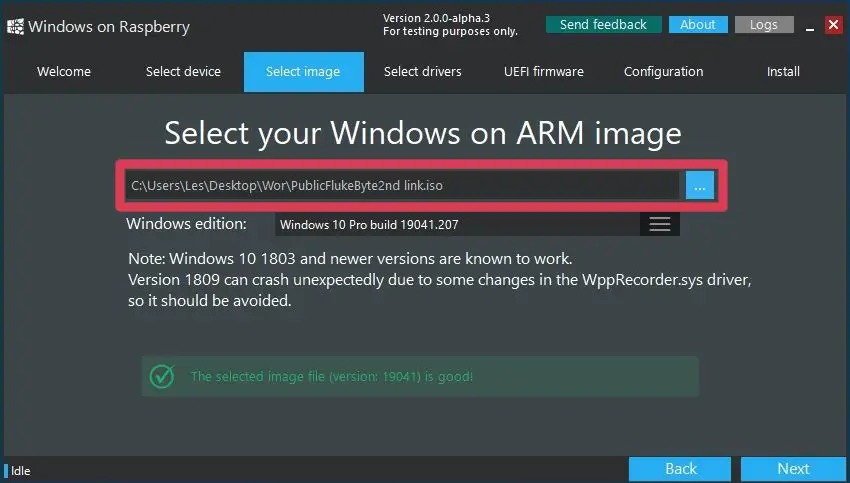
- Once all those selected, now navigate and choose the ISO file that we've built.
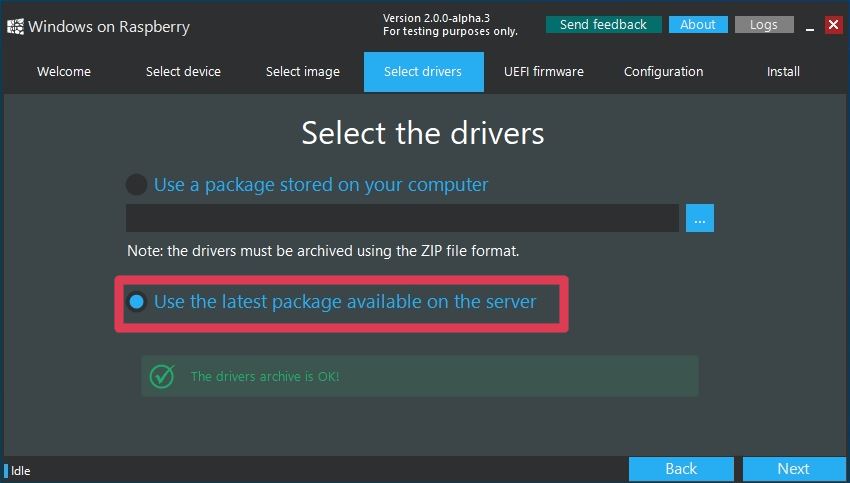
- The side by side step is to select the driver parcel from the server. Simply select the latest package.
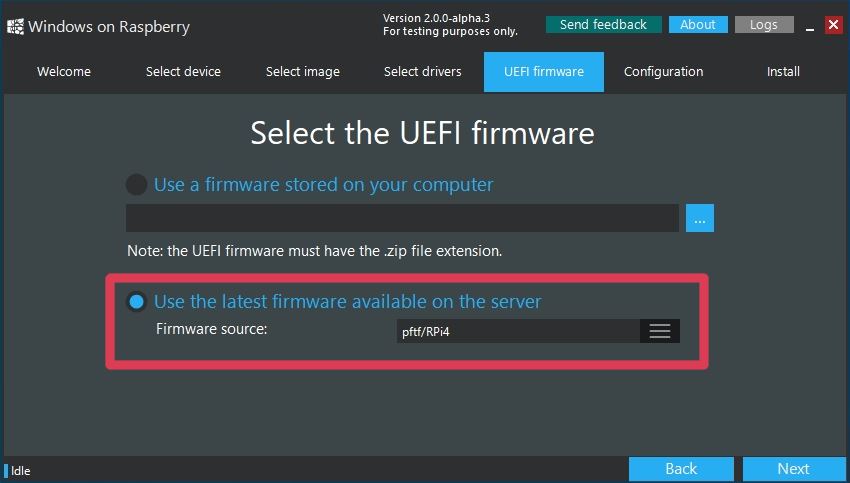
- Then select the UEFI firmware to flash. Hither also select the latest version available.
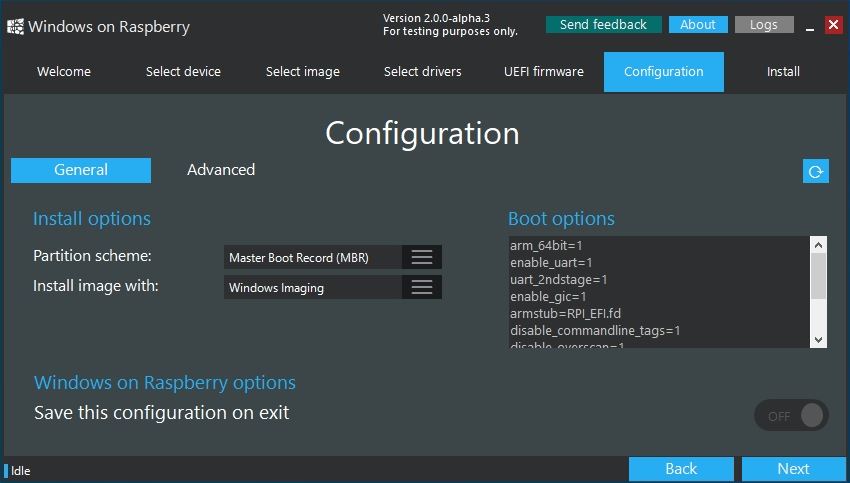
- Check the configuration and click Next.
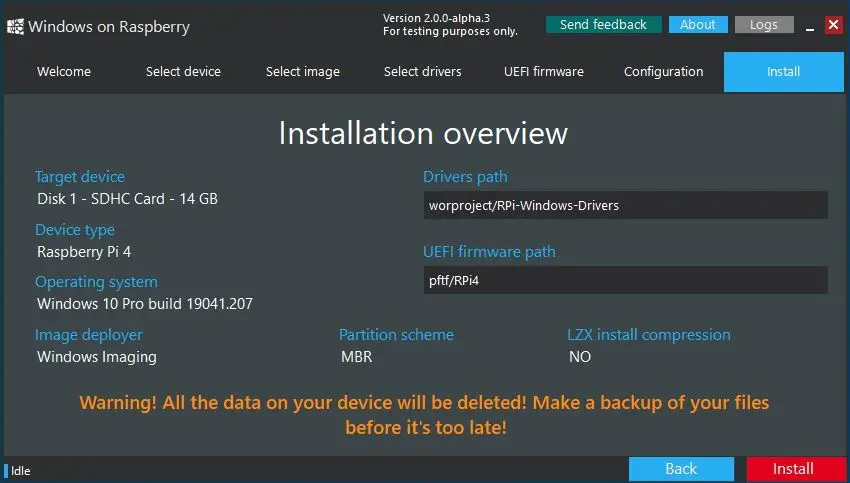
- And then you lot have selected all the things to become started with the install. Just double-check everything and click Install.
 The facility may take ampere farseeing as ane.5 to 2 hours, depending on the compose travel speedily of your SD Menu. This is why I recommend getting an A1 or A2 class SD Carte du jour or else an SSD drive to get the job done much faster. On an SSD drive, it may take just almost 15 minutes or so .
The First Boot
And now once the Raspberry Pi Windows ten facility is completed and your device is ready, you tin can straight plug information technology ( if you have an SSD ) into the Pi or insert it if yous take an SD batting society. then kicking it up. Since it is the get-go bang, it will have some prison house term to wholly initialize and configure things co-ordinate to your device and boot astir. however, from the moment kicking onwards everything volition exist fine and will piece of work as normal. If you are a founder and don ' t know how to prepare a remote control groundwork on your Raspberry Pi, precisely relax – I ' ve got that covered for yous. Head over to this yoke : How to Setup Raspberry Pi Remote Desktop on Windows/ Linux/ Mac ( v Methods ) Equally common with a typical Windows facility, yous will need to configure some things manually : for exemplar Cortana and the privacy policies that Windows normally tries to disable for you. in one case done with that, you will enter into a full-fledged Windows x on your cunning fiddling Raspberry Pi .
Overclock the Raspberry Pi
now that yous have successfully completed the Raspberry Pi Windows ten installation, and thinking to boost the performance ? well. That ' due south indeed a right think. Overclocking a Raspberry Pi will help you get the virtually out of your SBC and take your projects to the adjacent level. For this aim, I have written a comprehensive examination article on how to overclock Raspberry Pi lath. Yous can click on the connection and refer to the commodity .
How Does Raspberry Pi Windows 10 Perform ?
In my exam, the overall operation is pretty much adequate and it ' southward smoothly available. however, information technology has the be limitations.
- Resources limits will be reached quickly with some usage.
- CPU usage is nearly 100% while streaming YouTube in Google Chrome.
- Bluetooth support is also limited as the RTS/CTS lines are not exposed.
- Problems with HDMI audio out.
Though it is having some limitations, you will get a squeamish Windows 10 experience on your bantam estimator. You tin can get partially get rid of the resource exhausting trouble by providing an A2 class 32/64 GB SD card or a super-fast SSD tug .
now information technology ' southward your turn..
It ' southward at present your modify by reversal to endeavour the Raspberry Pi Windows x initiation and share your experience. I ' ve tried to make this tutorial equally simple as potential and yet if y'all have whatsoever queries only drop them in the comment department below. Found an issue with this article ? report it hither, so that I can resolve it.

Source: https://cmcdistribution.com.vn/en/windows-10-raspberry-pi-3-download-1639796996/
Posted by: phillipsharfidut.blogspot.com
0 Response to "How To Install Windows 10 In Raspberry Pi 3"
Post a Comment